For those of you who have never picked up a crochet hook in your
lives, we’ll run through a beginner course for you before we give instructions
on how to make a scarf in a later post.
You will be needing a crochet hook, generally a 4mm hook
works well for most projects and can be bought from just about any wool
supplier either online or in store, also some yarn/wool (4 ply or 8 ply works well) or crochet thread and you will also need a
pair of scissors.
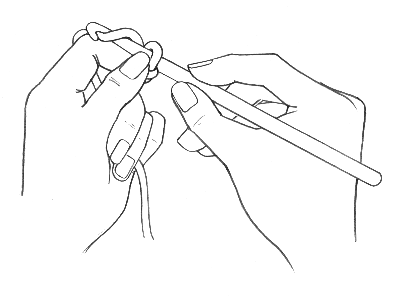
Next you need to learn how to hold the hook and the yarn, find
what works best for you.
There is the Knife
Grip, which as the name suggests is the same way you would hold a dinner
knife and there is the Pencil Grip, same way you hold a pencil. We have noticed that everyone holds both a knife and a pencil differently to everyone, so there is no right or wrong way to use the Pencil or Knife grip, go with what feels most comfortable to you.
If you find yourself holding the crochet hook too tightly or you have arthritis and your fingers perhaps don't grip the crochet hook as well as they could, it might be worth looking at purchasing a crochet hook handle, these come in various sizes, shapes, textures and colours and are designed to make crocheting more comfortable for you. Again you can find these at most yarn/wool suppliers, including the suppliers we listed in our previous post.
Next step is making a slip
knot which will be the start of your crochet. We found it easier to share with you step by step pictures, rather than try and tell you how to do a slip knot.
 |
How to hold the yarn when crocheting.
Again this varies from person to person, go with what is most comfortable.
 |
 |
 |
Once you have worked out your grip and how to hold the yarn, you'll need to learn how to make a chain. This is the fun and easy part, here you'll work out your tension and perfect it. With your hook in your right hand, yarn in your left hand, hook still in the slip knot you made, you now need to hook that string of yarn from your left hand and bring it back through the slip knot. That's it. Take a look at the diagram below to see how simple this step is. You can do as many links in the chain as you like, have fun.
 |
If you don't like the look of your chain, perhaps some links are tighter than others, it is very easy to pull them back (remove them). Take the hook out of the chain and pull the yarn back to where you want or even back to the slip knot. Put the hook back in the chain you want and work from there.
Your chain should look something like the image below.
 |
Doesn't look to make much sense does it? You can almost work it out from the diagram though.
Step 1) When you are changing from the chain to the single crochet, you generally put the hook through the second chain/stitch from the end chain/stitch (the chain/stitch the hook is in) otherwise the edge will look narrow and tight.
Step 2) So after putting the hook through the second chain/stitch (st) wrap the yarn over (yo) and pull the hook back through the stitch (st)
Step 3) Your crochet hook should then have 2 stitches on it again. Yarn over the hook (yo) and pull the hook through both loops (lps) on the hook so you have just one stitch on the hook.
You can make a scarf this way, using single crochet, grab yourself some multi-coloured yarn and it can end up looking wonderful. Practice by making a chain of 20 stitches and then start going back and forth doing single crochet as shown in the diagram above.
We'll teach you another stitch in our next post on crocheting.
We hope you liked this post, feel free to share and if you have any feedback or would like to know more, please leave us a comment.

Wonderful article, thanks for putting this together! This is obviously one great post. Thanks for the valuable information and insights you have so provided here.
ReplyDeleteSkull Scarves UK